IRIS is providing MIS reports based on the data present in IRIS Sapphire and on GST portal. These reports are created using GSTR 1 filed data, GSTR 2B data, GSTR 2A data and GSTR 3B filed data.
How to use MIS Report ?
1. Login to IRIS Sapphire
Once you logged in IRIS Sapphire, on top right- hand corner you will get “MIS Report” tab. MIS Report tab is visible at Root PAN, Legal PAN and GSTIN level.

2. MIS Report tab
When you click on MIS Report tab, MIS report page will open.

3. Prerequisites
You might need to go through prerequisites before generating MIS reports.
Before generating any MIS Report, data should be fetched for the particular period and sections in IRIS Sapphire for which the MIS report is required. If data has not been fetched then report will not be generated for that period or section and user will be shown a message that data is missing.
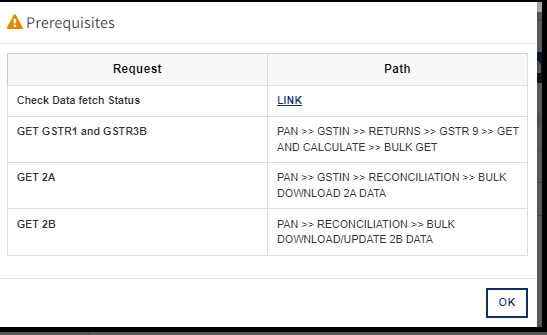
So before generating any report, user should check whether the data has been fetched or not. To check the fetch data status, click on Pre requisites tab. A Pop up window will get open which will indicate the path from where the respective data is to be fetched.
Also in order to know the last fetch status of each return the link for the compliance tracker page is given in the Pop Up window as “Check Data fetch Status – Link”.
On click on this link, compliance tracker page will redirect. This page indicates GSTIN and PAN wise data fetch status for each return period and financial year along with a percentage of data fetched.
![]()
If the data fetched percentage is below 100% means either all or some data is not yet fetched.
To fetch the data users have to visit the page as per the path showing in the prerequisites Pop up window.
Points to note: To get the correct amendment effect kindly ensures that all the previous months’ data has also fetched.
4. Report Filters
The user has to apply filter to generate MIS report. Following three filters are given to generate the MIS report.
| Filter Name | Selection | Point to note |
| Report Name | Select MIS Report Name from dropdown list. | At a time only one report can be selected. |
| GSTIN | Select GSTIN from the dropdown list. | MIS Report can be generated for one GSTIN or multiple GSTIN. |
| Return Period | Select return period for which report needs to generate. | MIS report can be generated for 24 filing periods at a time |

5. Generate MIS Report
After selecting all the filters, click on “GENERATE” button to generate the MIS report for the selected filters.
6. Download Report
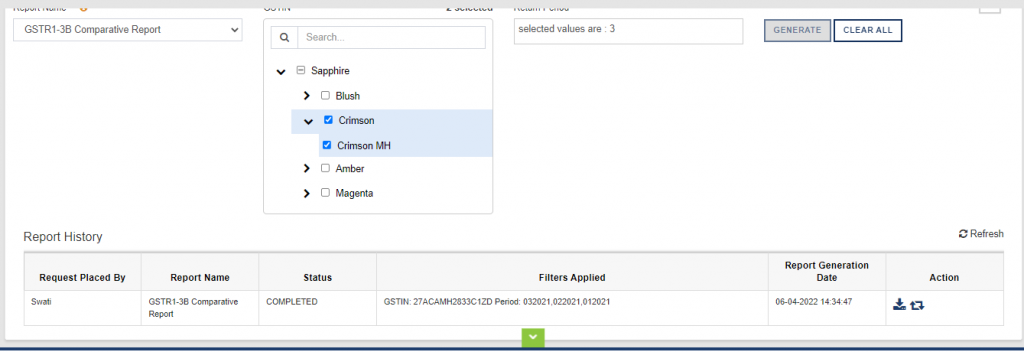
After clicking on the generation tab, check in the report history table for status of completion. When the report status shows completed, the report is available to download. The report can be downloaded in excel format.

7. Regeneration of report
If report has already been generated for the selected GSTIN and periods, in this case “GENERATE” button will be disable. The same report is already available in report history table, and user can download the report from there.
8. Re-generation of Report after missing data fetch
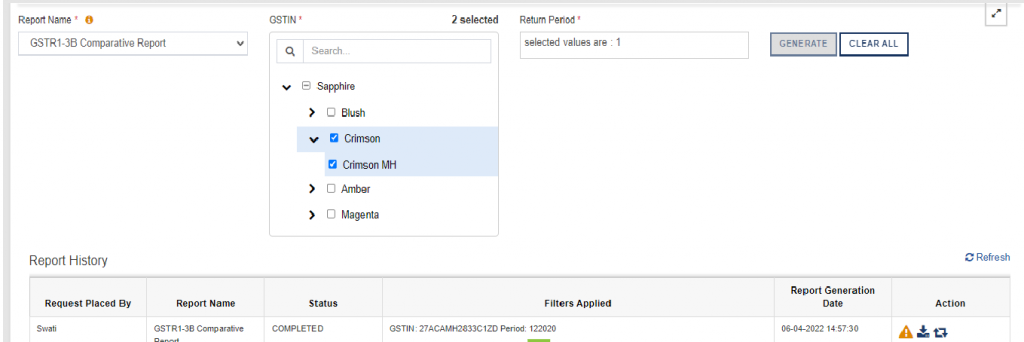
| If Report generate with this triangle sign, it shows that all data have not been fetched related to report. | |
 |
To Re generate the report with data, first user has to fetch the missing return data. After data fetching, click on “Regenerate” button. And fresh report will be available to download with data in history table. |


